DataCaster Initial Config and Data Source Connections

Initial Quick Setup

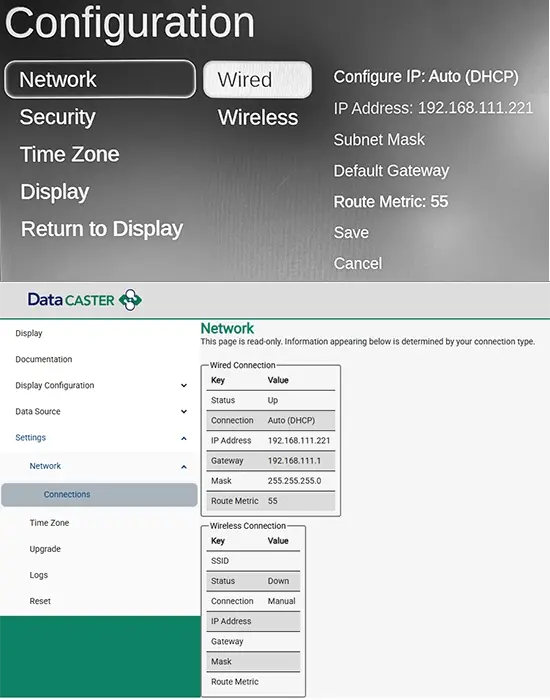
When you take your DataCaster out of the box, you connect a USB-A keyboard, HDMI to any screen, and apply power.  You'll be presented with options to set Wired or Wireless network connection, security password, and time zone as shown here. 

To avoid accidental lockout of a device that might be mounted high in a ceiling, these settings require connection of a physical keyboard, though wireless keyboards should work if you insert the keyboard USB dongle in the device.  The IP address of the device will be shown on screen in the event you didn't record it before leaving the configuration UI.  

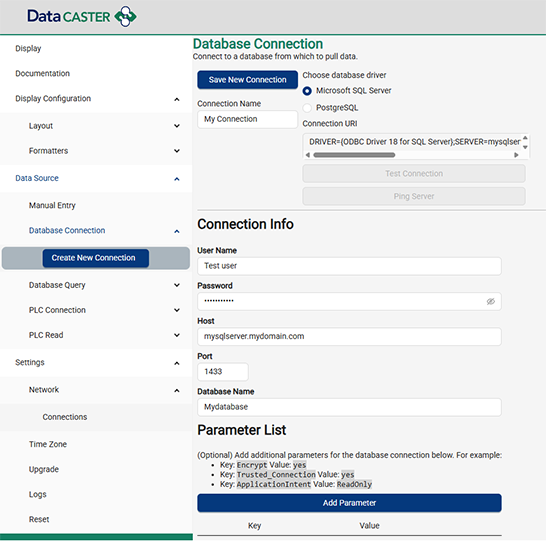
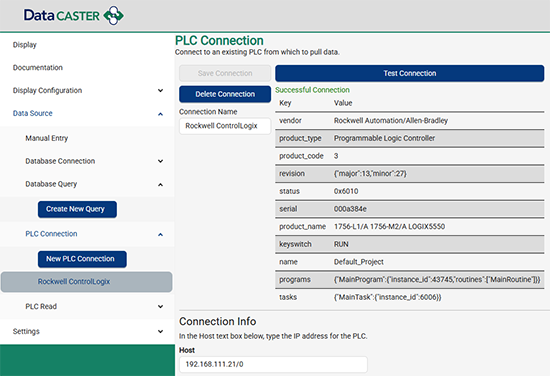
Once set you can disconnect and continue to setup your data sources in the browser UI from anywhere you can access the device on the network, starting with connecting your Data Sources as shown below

Rapid Native Data Source Connections

In DataCaster's browser based configuration menu, setup for the various types of data sources is done quickly. 

As more data source options are added, the appear in the menu shown here. 

Learn more about each type below


Database Connections

DataCaster supports multiple simultaneous connections to 

  • Microsoft SQL Standard & Enterprise
  • SQL Express
  • PostgreSQL

Connection strings are built for you through simple forms to insure accuracy based on the chosen database requirements.

If additional connection string parameters are required besides user name, password, hostname, port, and database name, they can be added to the parameter list shown here. (How to details)

Once setup click Test Connection to check your settings, then proceed to setup your reads, though it's better to get your displays setup and then you'll be able to map your data to the display in one step!

PLC Connections

At this time the DataCaster supports native connections using Ethernet/IP CIP protocol to Logix Family PLCs as shown here. 

Multiple simultaneous connections to different PLC types are supported. 

Setup your connection first by simply specifying the IP address of the PLC followed by a / and the CPU slot #, or 0 for PLCs with fixed CPU location.

Once setup click Test Connection to check your settings, then proceed to setup your reads, though it's better to get your displays setup and then you'll be able to map your data to the display in one step!

Manual Data Entry

For situations where you need to push values to a screen manually, perhaps short messages that do not change often, etc, you can login to the DataCaster user interface and update not just the value, but if you've allowed it in screen layout settings, you can even change the heading on an attribute. 

REST Client to DataCaster

Any software application or embedded device that can operate as a REST client and send a properly formatted payload can connect to the REST webservice server that is in the DataCaster and update data values on the screen.  Headings can also be updated if allowed in your screen layout.

Full API documentation is accessible through the password protected configuration UI.